“Plate solving” is one of the key methods behind locating an astronomical image precisely on the sky. It’s also a nice example of how astronomy has moved from the era of photographic glass plates to today’s fully digital workflows.
In our club chat we discussed the term “plate solving” and what it should be called in Finnish. In English the term comes from the photographic “plates” (glass plates) used for recording images. In practice the concept is broader: it is an astrometric solution (or astrometric calibration) for an image.
1. What is “plate solving”?
Plate solving is the process of determining an image’s exact sky coordinates: right ascension (RA) and declination (Dec), as well as the image’s rotation and scale (arcseconds per pixel). In other words: it answers “where is this image on the sky, and how is it oriented?”
This is essential for many astronomy and astrophotography tasks, for example:
- Aligning and stacking multiple exposures reliably
- Automated “go‑to” pointing and target centering (mount control)
- Building mosaics where panels must match precisely
- Measuring positions of moving or transient objects (asteroids, comets, supernovae)
- Photometry and other measurements where accurate coordinates matter
2. The historical glass‑plate era (late 1800s → late 1900s)
For a long time, astronomical images were recorded on glass plates coated with a photographic emulsion. A plate could contain thousands of stars — but turning those dots into scientific measurements was slow, painstaking work.
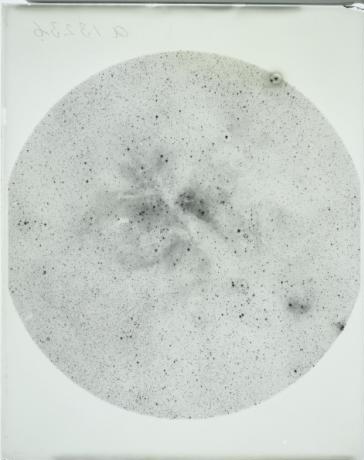
- Step 1: Image recording. The telescope image was projected directly onto a glass plate coated with a light-sensitive silver halide emulsion. Long exposure times (up to hours) were necessary to record faint objects. The glass plate was chosen for its stability compared to, for example, a roll of film – it did not shrink or stretch in the same way during development, which was important for accurate measurements.
- Step 2: Plate development. The exposed plate was chemically developed in a darkroom, where the light-sensitive silver crystals were converted into a visible image as the stars left black spots or patches on the transparent or partially transparent plate.
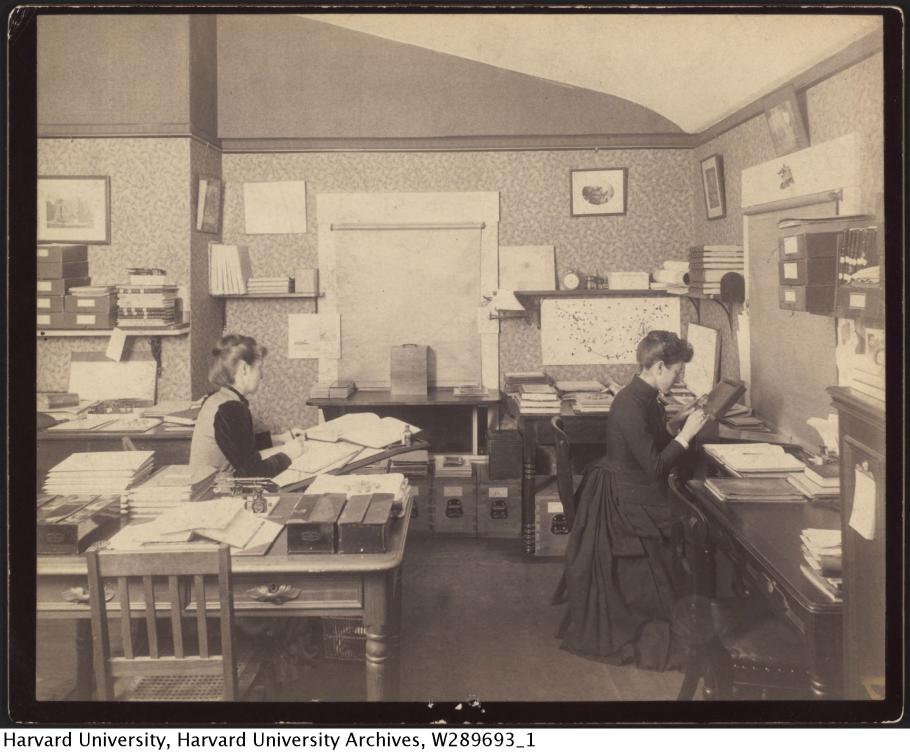
- Step 3: Star identification and measurement. This was the heart and most work of the process. Certain, bright stars – called “reference stars” – were identified visually by comparing the constellation pattern on the plate with a known star chart or catalogue. These reference stars were chosen so that their coordinates (RA, Dec) were already precisely known. This manual pattern recognition required a trained eye. Once the reference stars had been identified, their exact (x, y) coordinates on the disk were measured using a measuring device. After this, the (x, y) coordinates of all other visible (and desired) stars in the image were also measured using the same device.
- Step 4: Coordinate Calculation. In this step, the measured disk (x, y) coordinates were combined with the known celestial (RA, Dec) coordinates of the identified reference stars. Using mathematical methods, a transformation was calculated that described how the disk (x, y) coordinates corresponded to the celestial (RA, Dec) coordinates. This transformation took into account the scale, rotation, position of the disk, and possible optical distortions. Once this transformation was calculated, it was applied to the (x, y) coordinates of all measured stars on the disk to calculate their exact (RA, Dec) coordinates in the sky.
- Step 5: Creating a star catalog. The results of the calculations were recorded, and these measurements were used to compile huge star catalogs. The work was massive and could take years or even decades to create a catalog covering a single area of the sky. The work was often done in pairs, with one person making the measurements and the other recording the results.
3. The modern, digital era (1990s → today)
With CCD and CMOS sensors, images are recorded digitally and can be processed by software in seconds. In astronomy, images are often stored as FITS files, which preserve not only pixel values but also metadata.
- Step 1: Image capture. A digital camera (CCD or CMOS) captures the image electronically and saves it as a file.
- Step 2: Star detection (algorithm). A computer program analyzes the digital image file. The program automatically identifies bright objects in the image that are likely to be stars (or other small, point-like objects). It determines the exact pixel coordinates (x, y) and brightness of each identified object.
- Step 3: Pattern generation (algorithm). The program analyzes the pattern formed by the identified stars. For example, it can calculate distances and angles between the nearest stars or form triangles between the stars. This creates a “fingerprint” of the star cluster visible in the image.
- Step 4: Star catalog matching (algorithm). This is the heart of modern astrometric calibration. The program compares the star pattern (fingerprint) identified in the image with huge digital star catalogs (e.g. USNO-B1.0, UCAC4, Gaia DR3). These catalogs contain the exact coordinates (RA, Dec) of millions or billions of stars. The program searches the catalog for a region whose star pattern matches the pattern shown in the image with sufficient accuracy. Advanced algorithms (such as those used by Astrometry.net) can find this match even without any prior knowledge of the image location, scale, or orientation (“all-sky solving”). This is a huge improvement over manual work, which required at least rough information about the image object. Once a sufficient number of stars have been successfully matched between the image and the catalog, the program identifies which region of the sky is shown in the image.
- Step 5: Calculating the WCS transform (Algorithm). Once the match is made, the program uses the pixel coordinates of the matched stars and their known catalog coordinates (RA, Dec) to calculate an exact mathematical transformation (WCS transform) that describes the relationship between the pixel and sky coordinates. This transformation takes into account the scale, rotation and position of the image very precisely.
- Step 6: Saving and reporting the result. The calculated WCS transformation is usually written directly into the header of the image file (FITS). The program also reports the found image center coordinates, scale (usually arcseconds/pixel) and rotation angle.
In practice, the whole solve can take seconds to a minute or two depending on image quality, field of view, and computing speed.
4. How to plate‑solve your own image
Nowadays this is relatively easy and often even free. All you need is your digital star map, which you don't even need a telescope to take, a system camera and even a phone are enough. In this case, the image formats JPG, TIFF or PNG are also suitable, so you don't necessarily need a FITS image.
Let's go through an example of how to solve one of my star maps on Astrometry.net and hopefully it will inspire you to try the same:
-
Step 1: Take a star map. Take a picture of the starry sky with a telescope or camera. The
picture can be almost anything - a single image, part of a mosaic, a picture of a deep sky object or even
just a star map of a wider area. The more stars there are in the picture and the more clearly they stand
out from the background, the easier it is to solve.
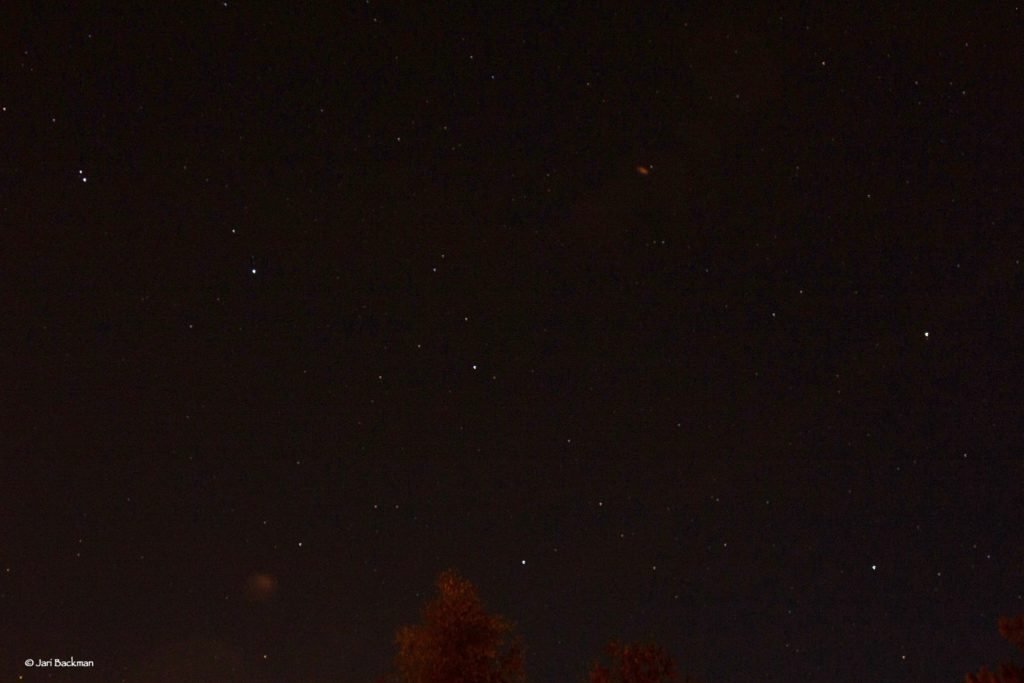
A picture of the northern sky taken with my old Canon EOS 6000D system camera. Focal length 55 mm, f/7, ISO1600, exposure 8 seconds. Quite a few stars and in the middle at the bottom, a large tree in the landscape is faintly visible. -
Step 2: Choose a tool. You have several options, but the most popular is definitely
Astrometry.net.:
- Go to their website (http://nova.astrometry.net/).
- Registration is not mandatory, but recommended so that you can manage your uploads.
- Click “Upload” or similar.
- Select your image file from your computer.
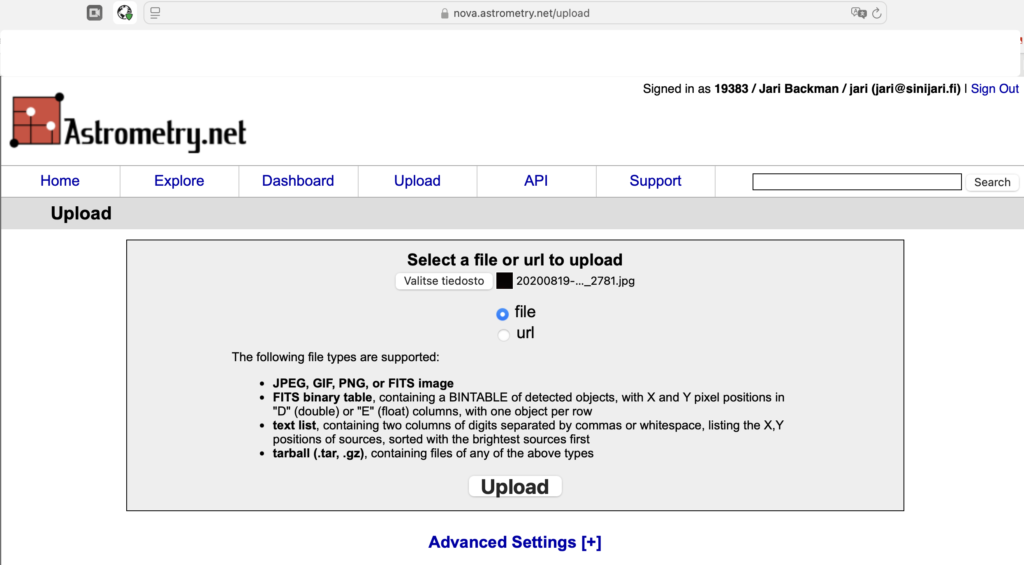
I clicked ‘Upload’ and in the window that opened, I went to my folder and selected the star image. -
Step 3: Start analyzing the star image
- Click ‘Upload’ to send the image to the service.
- Wait. The service processes the image, identifies the stars and compares them to the star catalogs. This can take from a few seconds to a few minutes depending on the size of the image, the number of stars and the load on the service.
- Once the solution is found, you will see the green word 'Success' on the screen, click 'Go to results page' and you will get a report with the exact coordinates of the center of the image, scale, rotation, and a link where you can download a version of your image with the center coordinates (a FITS file with WCS in the header) and visually see how the catalog stars have been matched to the stars in your image.

When you see the green 'Success' text next to your image, you have successfully solved your constellation and you can get more information from the 'Go to results page' link. -
Step 4: If you do not get a solution. If the solution failed, there can be many reasons:
too few stars in the image, the stars do not stand out (overexposed or too dim), the image is too blurry
or there is a technical problem. When using cameras and phones, it is strongly recommended to use a timer
and a tripod or other support when using exposure times of several seconds.
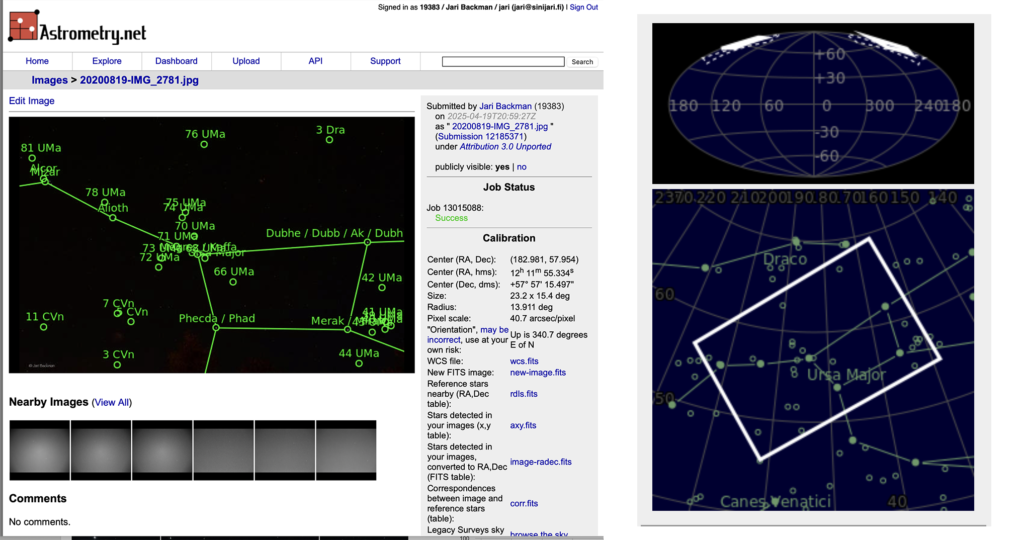
A solution of a constellation, where the stars are named on the left and the constellation Ursa Major is depicted. In the middle, in the information box, the coordinates of the center of the image, the size of the image and on the right, the location of the constellation in the starry sky. This is a wide image of almost 28 degrees in diameter and similar results can also be obtained with ordinary phone cameras. Astrometry.net is known as a very robust solver and is connected to many astronomy software as a solver.
5. References and Further Information:
Astrometry.net:- Website: http://nova.astrometry.net/ (Best place to try it yourself)
- Lang, Dustin; Hogg, David W.; Mierle, Kyle; Blanton, Michael; Roweis, Sam (2010). “Astrometry.net: Blind Astrometric Calibration of Arbitrary Astronomical Images”. The Astronomical Journal, Volume 139, Issue 5, pp. 1782-1800. (Often available by searching on arXiv.org) – This is a thorough description of a modern algorithmic approach.
- From Calculator to Astronomer, Smithsonian Air and Space Museum.
- The People Behind the Glass Plates and Notes, Smithsonian Air and Space Museum You can find a lot more general information by searching for “Harvard Computers” or “Harvard Observatory women”. Many books and articles discuss their story. For example, Dava Sobel’s YouTube presentation “The Glass Universe: How the Ladies of the Harvard Observatory Took the Measure of the Stars”.
- Also, don’t hesitate to ask your fellow stargazers.
- Plate solving in Wikipedia
- Astrometry in Wikipedia