January this year nudged Jari into a new observing adventure after watching
The Astro Imaging Channel
webinar about alternative ways to use the Seestar. He had considered buying the Seestar S50, but the
understanding of its capabilities felt quite limited — until Kai Yung’s ideas about using an equatorial
wedge, sky coordinates, and even basic spectroscopy got Jari excited.
After about a week of research he placed an order at the Finnish dealer
Astro Art (Mikkeli), and by mid‑February he owned
the second telescope of his life. The first one was in the 1960s from a mail‑order shop — and went back for
quality reasons. This one would not be returned.
Outside the EU the scope sells for roughly €500. Considering VAT, customs and shipping, €699 in Finland felt
reasonable, especially with local warranty and support.
Convenient under the stars
This Chinese‑made ZWO telescope emphasizes convenience. No more long, cold setups: I can observe comfortably
from the yard. The Seestar app is available for both Android and iPhone.
Seestar’s first outing.
On this blog I’ll share notes and pictures from this new way of observing. With the Seestar I can look at
the Sun, Moon, stars and deep‑sky objects; below are my very first impressions.
From deep space to phone screen
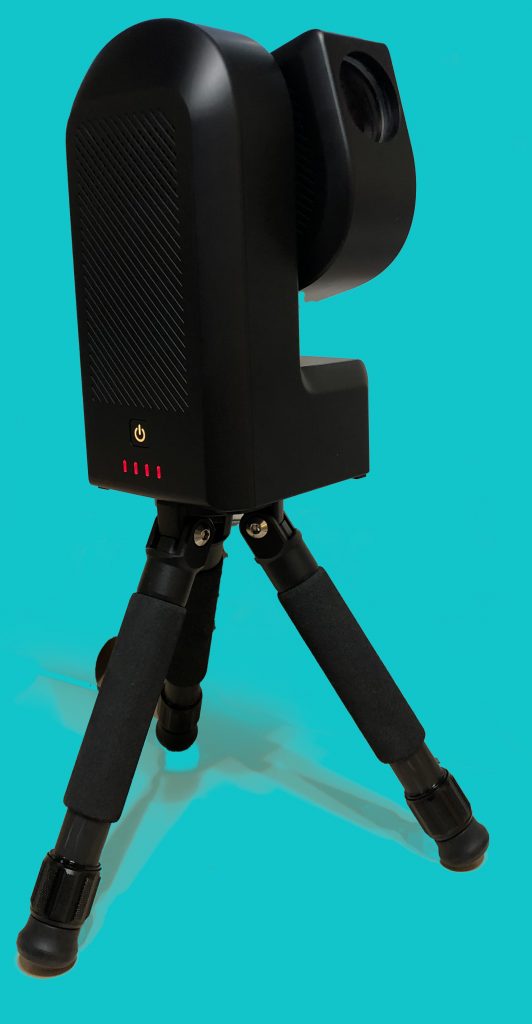
The Seestar is a 50 mm apochromatic refractor with a 250 mm focal length. Its optical path uses
two perpendicular lenses that fold the light by 180° before it reaches Sony’s IMX462 sensor. The compact
unit integrates the telescope, an electronic focuser, an astronomy camera, a controller (ASIAIR‑like),
tripod interface, dew heater and a filter wheel — all in one 2.5 kg package.
Seestar on its stock tripod.
Built‑in Wi‑Fi and Bluetooth let you connect directly from a phone or tablet without internet. On a home
network the Seestar can also stream to displays or further afield.
Three screens from the Seestar app on iPhone.
The scope ships with a carry case suitable for flights. The tripod is surprisingly short (just over
350 mm) but fits neatly in the case and is always with you. A solar filter is included for daytime
observing.
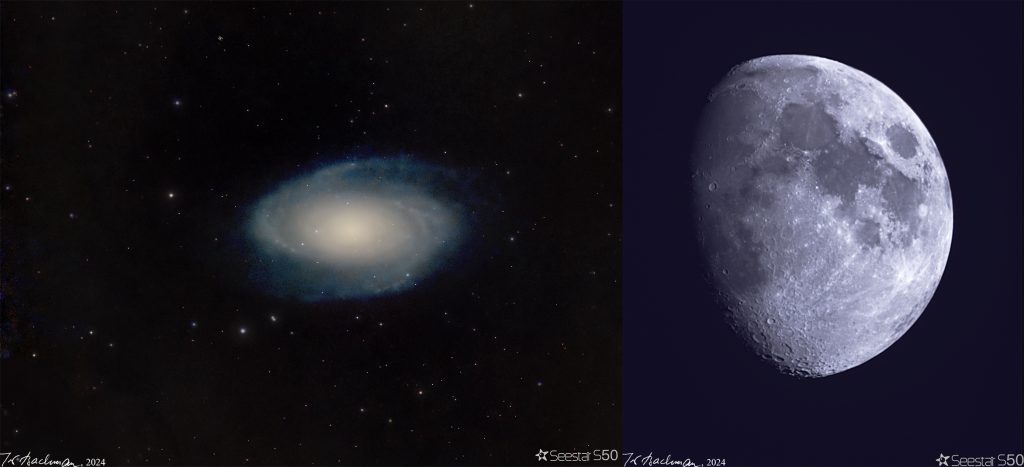
First images: M81 (about 22 minutes total, two nights) and a 19‑second lunar video, processed in
PixInsight and Photoshop.
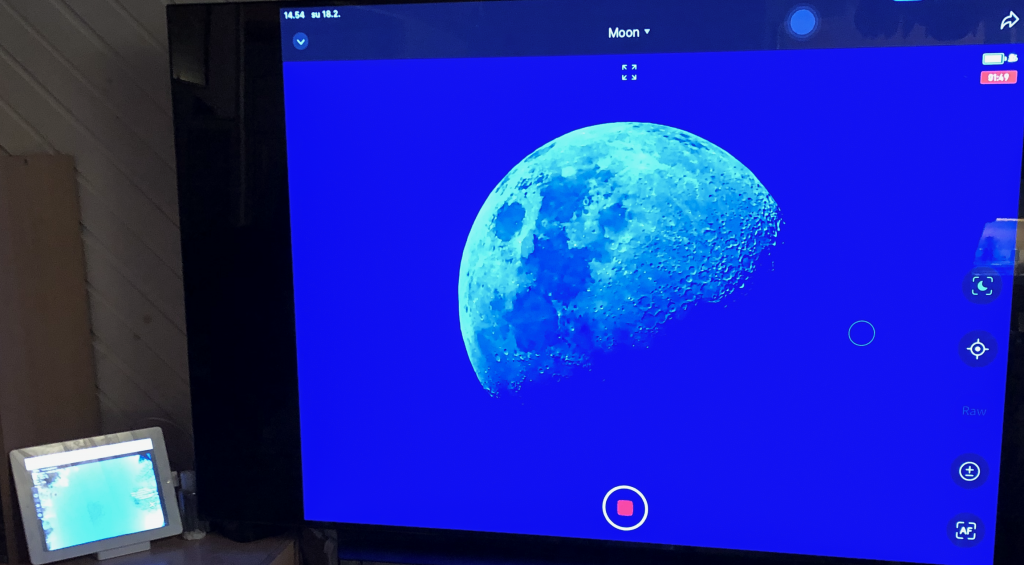
Imagine placing the telescope outside, powering it on, then heading back indoors to control everything from
the sofa. Family can watch the developing image on the TV — a shared experience of the night sky.
Observing from indoors while the scope works outside.
The smart bits
The Seestar is more than a tube with lenses. The Facebook group
Smart Telescope Underworld
has been a great source of tips for broadening its use. An equatorial wedge and even simple
stereo/dual‑epoch measurements open new avenues for amateur science. Small tweaks also help: sending targets
via celestial coordinates, checking files the device skipped, or setting objects from SkySafari or
Stellarium.
A 3D‑printed equatorial wedge between scope and tripod aims the mount toward the celestial pole.
What the Seestar saves
Each session produces a processed image for quick viewing and storage on the device. You also get a stacked
and calibrated linear image from all accepted sub‑frames. Optionally the device can save individual
FITS frames so you can process from scratch. (Bayer pattern: two green, one red, one blue per pixel.)
Early on I’ve found the in‑device stacks to be consistently excellent — better than I can yet reproduce,
which is encouraging for beginners. JPEG versions are also stored.
The Sun, Moon and planets can be captured as AVI video and stacked into a high‑quality image in the app;
usually under a minute of video suffices (your mileage may vary). MP4 is also available.
There is 64 GB of onboard storage — enough for several nights — but keep an eye on it. A big plus is
that images can be copied over the local network directly to a computer. The file system auto‑creates
subfolders with target names; if FITS saving is enabled, those frames are placed in a sibling folder per
target.
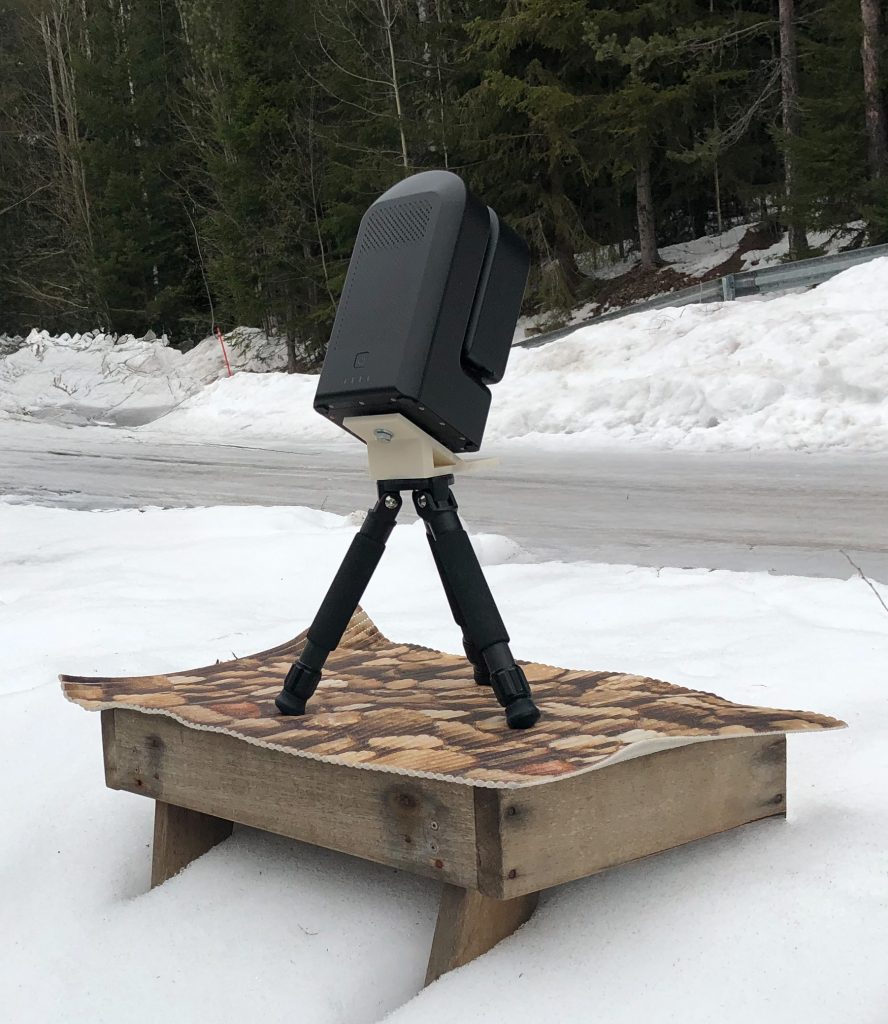
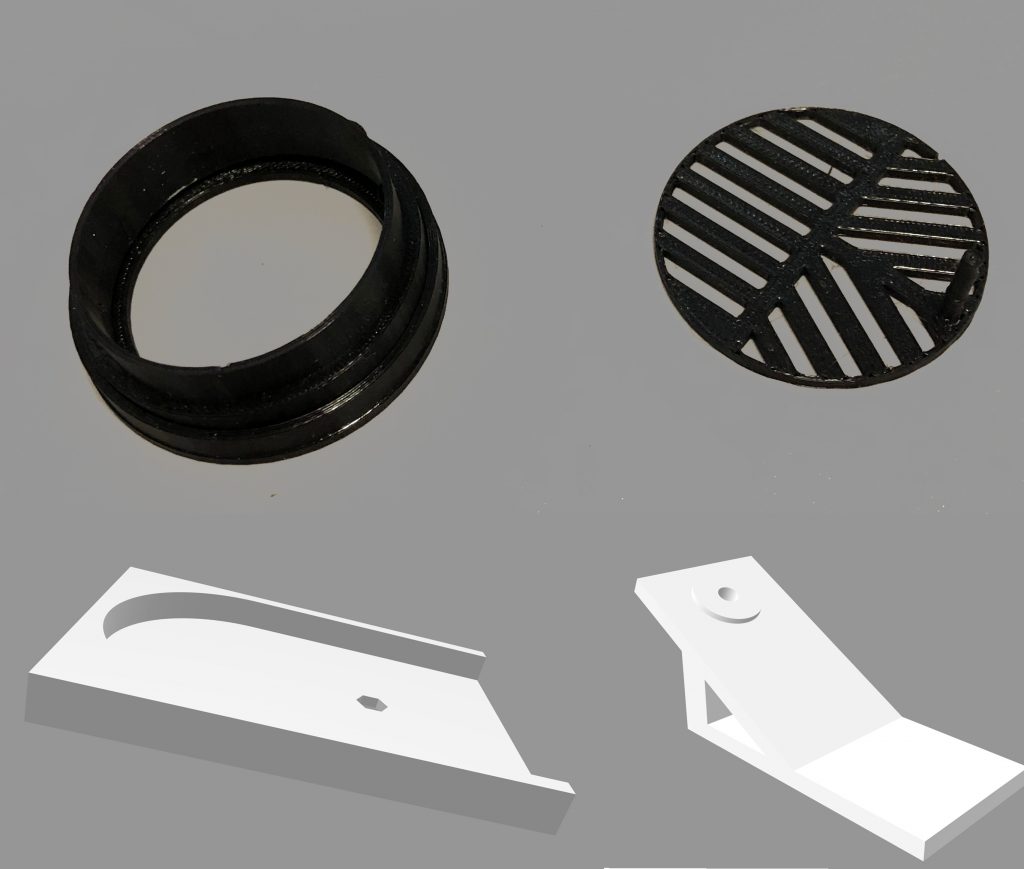
Custom accessories
Around the world users have designed handy add‑ons: a 3D‑printed equatorial wedge (set to your latitude), a
“cradle” for true horizontal mounting, filter holders, Bahtinov masks and more. Some models are on
Thingiverse.
3D‑printed accessories. Top row from Thingiverse (Ø 50 mm). Bottom row: my own cradle for horizontal
mounting and a 29° wedge for the S50.
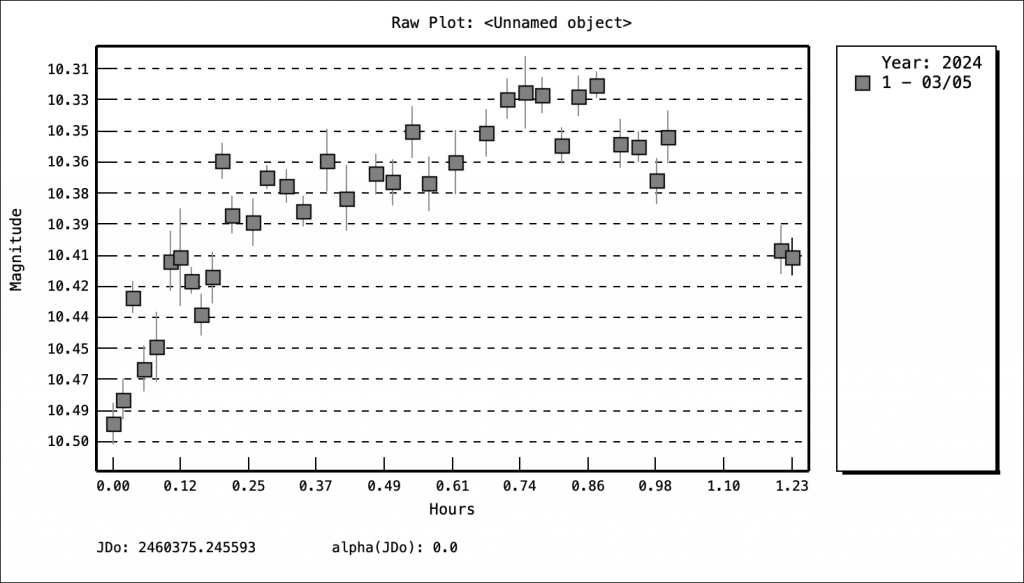
Asteroids, comets & variable stars
The Seestar is surprisingly capable for near‑Earth and Milky Way targets. I’ve already recorded asteroid and
comet motion and I’m keen to track rapid brightness changes in their light curves.
Asteroid Metis light curve on 5 Mar 2024 (made with Tycho Tracker).
I’ve logged over 10,000 observations in the AAVSO community. Alongside Slooh and AAVSO remote scopes, the
Seestar lets me also pursue short‑period variable stars from home. I’m considering applying for an observer
code from the IAU Minor Planet Center to contribute useful data to professionals.
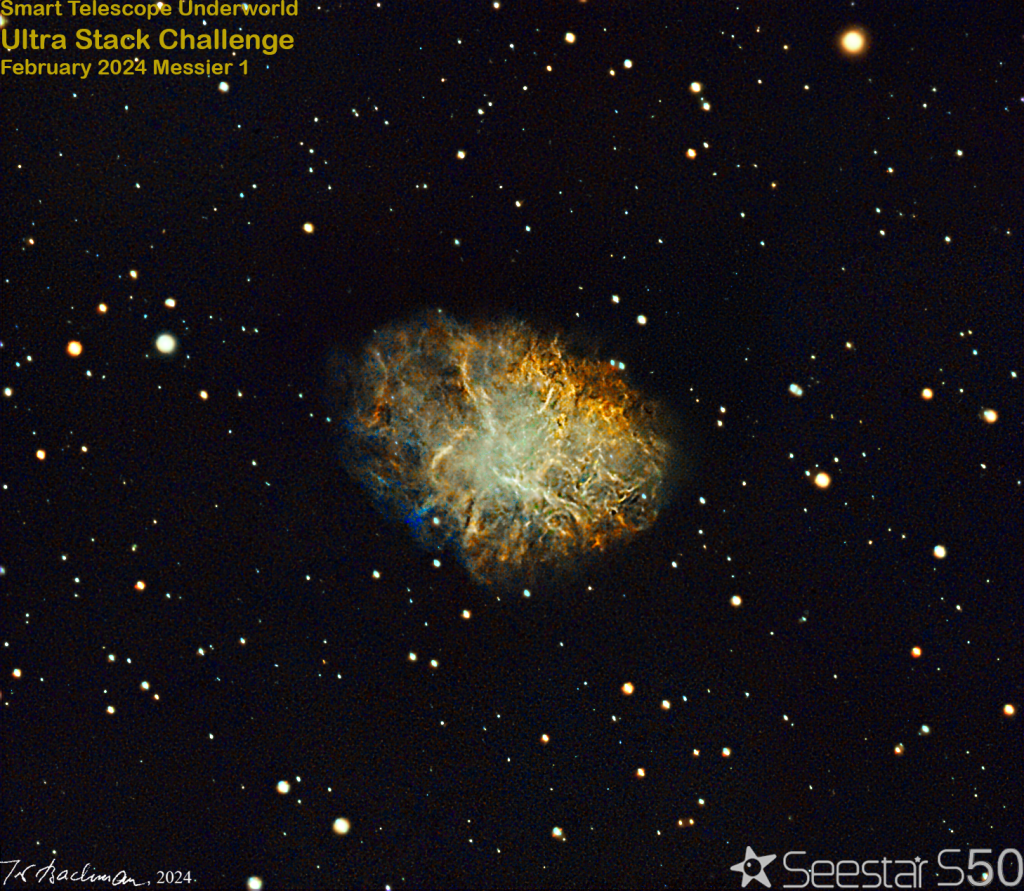
Community project in Smart Telescope Underworld: 32 members contributed over 72 hours on the Crab Nebula
(M1). I processed this combined stack in PixInsight and Photoshop. (March target: M51; in the south: the
Antennae, NGC 4038/4039.)
A dream device for clubs
For astronomy clubs and group events the S50 is an ideal tool. Solar and lunar viewing work well for larger
audiences, and multiple Seestars on the same network can cover more sky. For beginners it’s also a great
“first light” experience — the interface even suggests good targets for the night. A club could publish a
monthly target list tailored for Lappeenranta’s latitude.
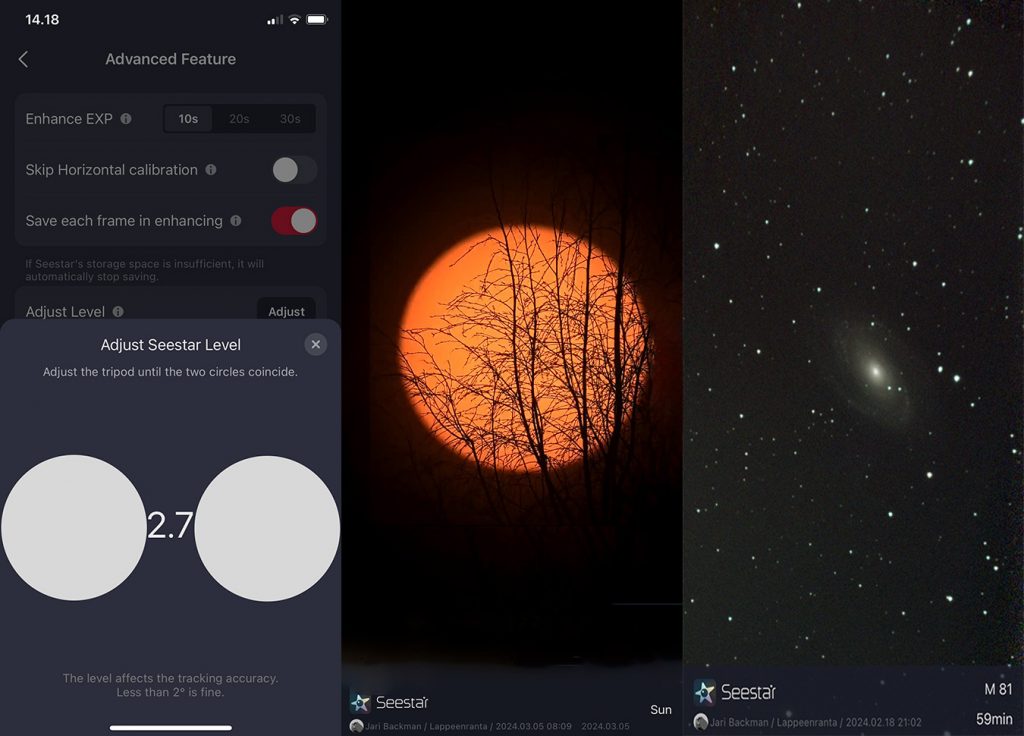
Leveling view (left), the Sun (center) and M81 (right). The stacked image refines continuously as more
subs are added.
Pros & Cons
I’ve had the scope out for five longer sessions so far, so this is early feedback. My first lunar image was
captured within an hour of picking up the package. Using the compass and GPS, the Seestar finds the Sun and
Moon automatically. In daytime the Moon sometimes needed a manual nudge (the short tripod isn’t ideal for
sighting along the tube). At night the default alt‑az mode worked very reliably once stars were visible from
the site.
Equatorial operation took more practice: the scope should see a wide, open sky area at least 60° up. From
that position the system solves the sky astrometrically with three alignment fields — each must succeed for
the solve to complete. With a little practice I got it working; the goal is to mount the S50 on our porch
roof.
Roses
Lightweight and compact
Wireless networking
Versatile app
Carry case
Much broader use than the brochures imply
Fast to get started
Useful output formats and in‑device stacking
Thorns
Tripod adjustments are awkward
No remote power‑on; you must press the button
Built‑in UV/IR‑cut filter cannot be removed (limits spectroscopy)
Manufacturer limits some ASIAIR‑like capabilities
Stacking rejection can be high (sometimes >50%); changes in sky conditions are easy to miss — clouds
are silent