Idea
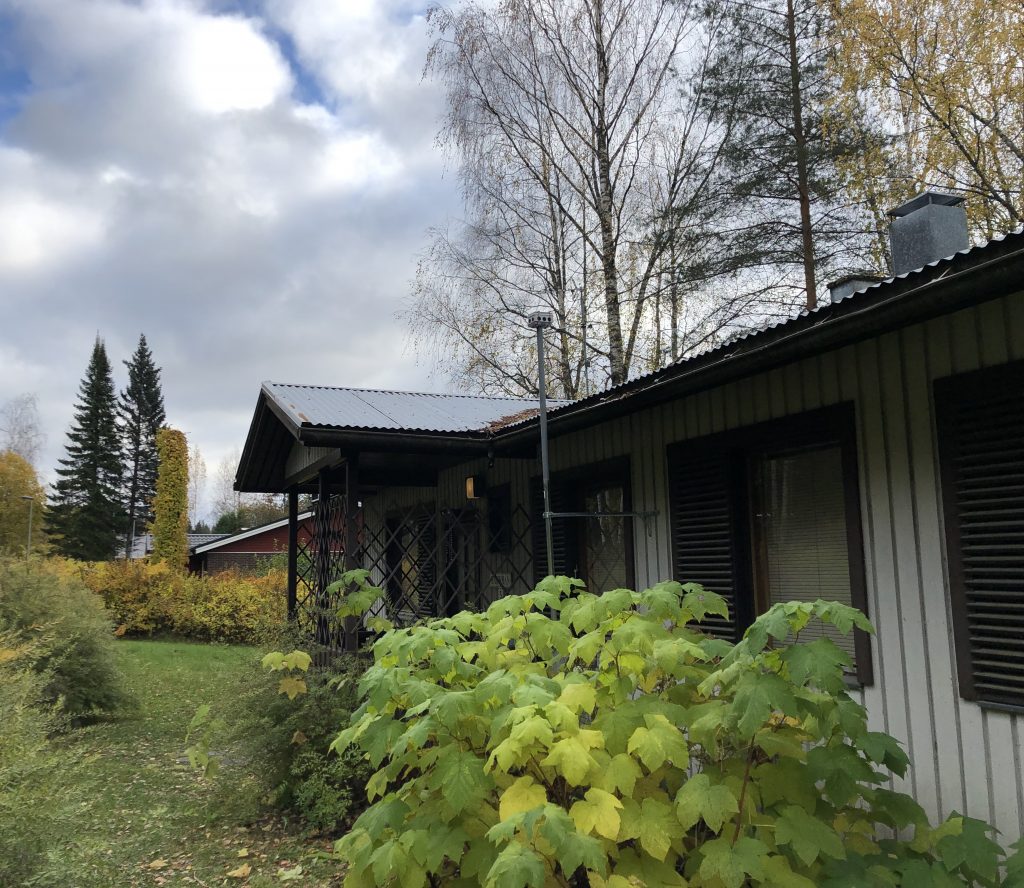
I had long considered getting an all‑sky camera. The problem has been our own and our neighbors’ beautiful birches that provide cooling shade in summer — and a few years ago even prevented us from installing solar panels. For the same reason I assumed an all‑sky camera would be a poor investment.
In the summer I watched two talks on building an all‑sky camera. Linda presented hers on The Astro Imaging Channel and Riku at the Cygnus meeting. Both introduced using a Raspberry Pi and convincing software to run it.
Based on those, I realized that we actually have fairly open views to the east and west, and despite the trees there is usable sky from about 30–40° altitude toward both the south and the north. That sounded promising — and gave me a good reason to learn the Raspberry. With it I could even monitor some brighter variable stars.
Raspberry Pi
I started planning in July; the first order — a Raspberry Pi 4 starter kit — went out on 8 August. I added a camera, a wide‑angle lens, a power supply and an Ethernet cable. Then I learned the shipment would be delayed waiting for the lens; a few weeks later it turned out the cable (which I could have bought locally) was the new delay. After some feedback to the seller I received the package on 21 September.
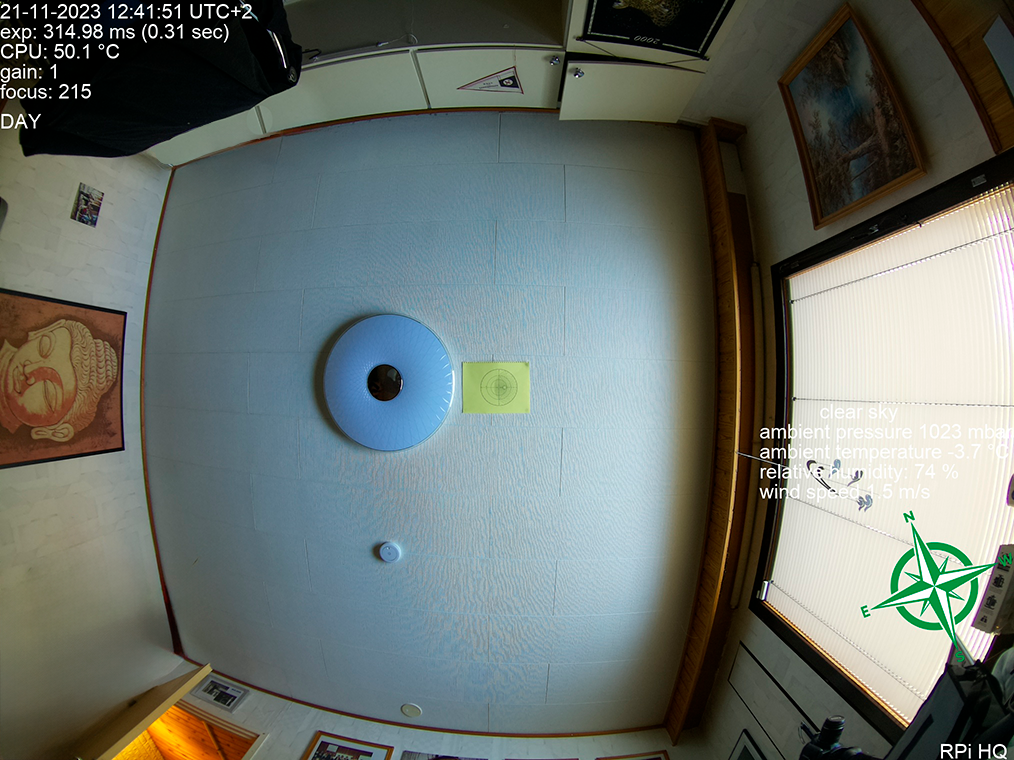
I began learning the Pi and planning the installation. Within a few days I installed Thomas Jacquin’s AllSky software — soon my monitor showed a wide‑angle view of my study.
The lens focal length is 2.7 mm, which doesn’t quite cover the entire sky. The manufacturer’s field of view is 140° in one direction and 102.6° in the other. That should reach down to 20° above the horizon in one direction and 39.2° in the other; with the sensor size the effective diagonal approaches 180°.
The Raspberry Pi runs on DC power; with Power over Ethernet (PoE) you can deliver power and data over the same twisted‑pair cable. For devices drawing over 13 W the cabling should be at least CAT5 grade. I added a PoE HAT with a fan, which powers the camera over Ethernet.
Enclosure
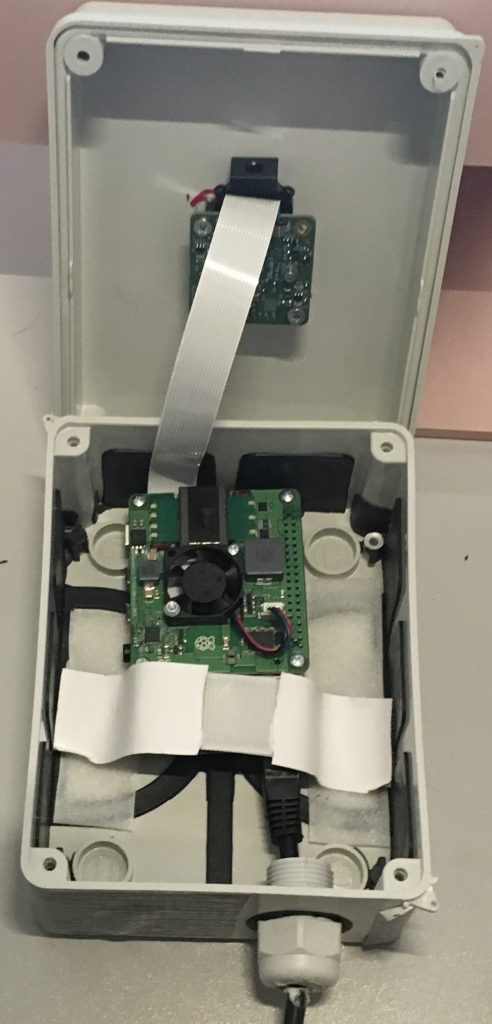
In the end I chose a rectangular electrical enclosure slightly larger than the Pi and drilled a hole in the lid for the camera. Most all‑sky cameras use an acrylic dome to protect the lens and electronics. I briefly considered leaving the dome out but ended up installing a 25 mm dome set into a rubber gasket and taped carefully onto the lid.
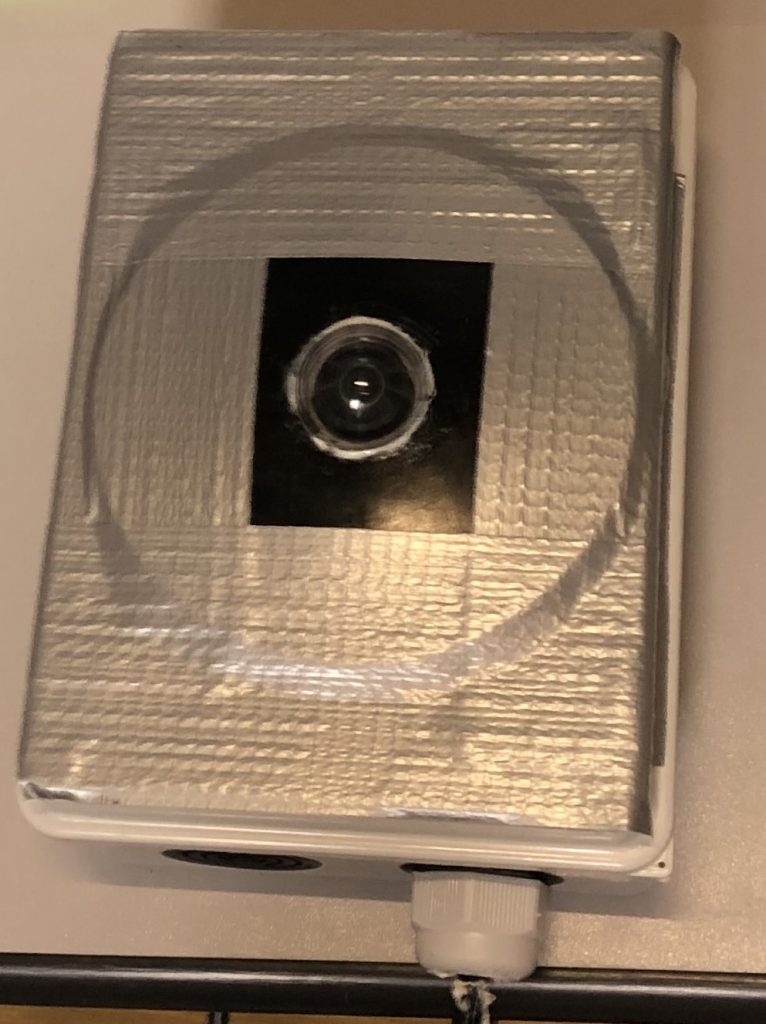
The housing is mounted about a meter above the eaves on a wall‑mounted antenna mast. This makes aiming and maintenance easy.
Checking the Cardinal Direction
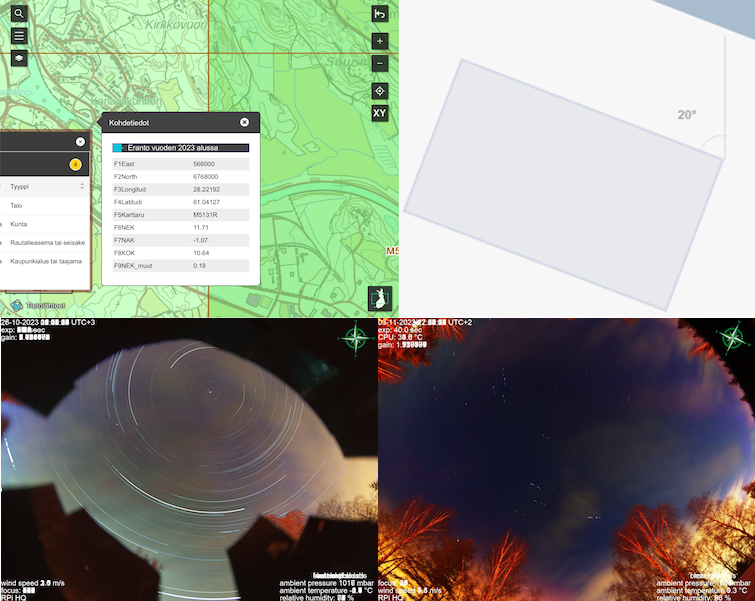
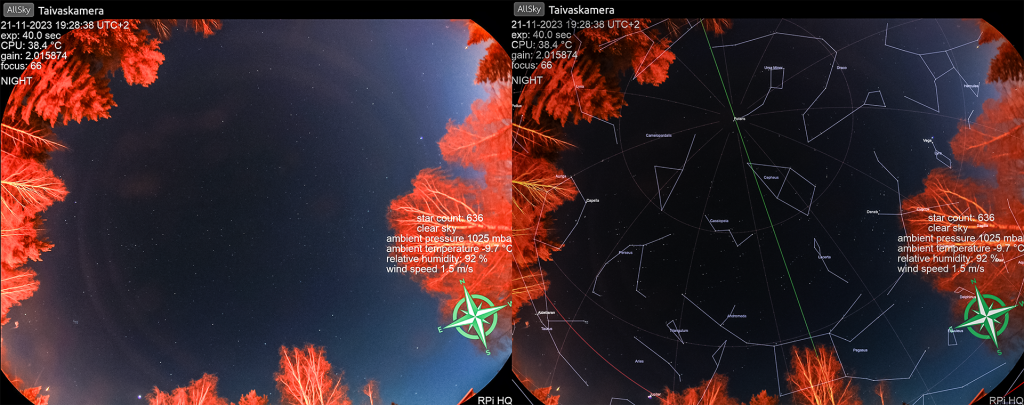
For almost forty years I believed our house’s long axis ran close to east–west. I had aligned several telescopes with a phone compass app and that seemed about right. The AllSky overlay (constellations, planets and bright deep‑sky objects) told a different story: Polaris and Ursa Minor were clearly off. The reason was the considerable magnetic declination in Lappeenranta. True (map) north here is about 10.6° west of magnetic north, and from Google Maps the building’s alignment is almost 20° off.
Rotating the overlay 18° counterclockwise solved the mismatch.
I also noticed the largest trees were in the corners of the frame where the field of view is widest, while the central area had clearer sky. By rotating the camera itself by 45° I recovered more useful sky and switched from physical masks to software overlays.
Weather Resistance
I hoped to keep moisture out, but after a few weeks I saw clear traces of water inside the dome — likely condensation from ambient humidity trapped during installation. The main enclosure stayed dry. The internal temperature runs over 40 °C warmer than ambient due to the CPU.
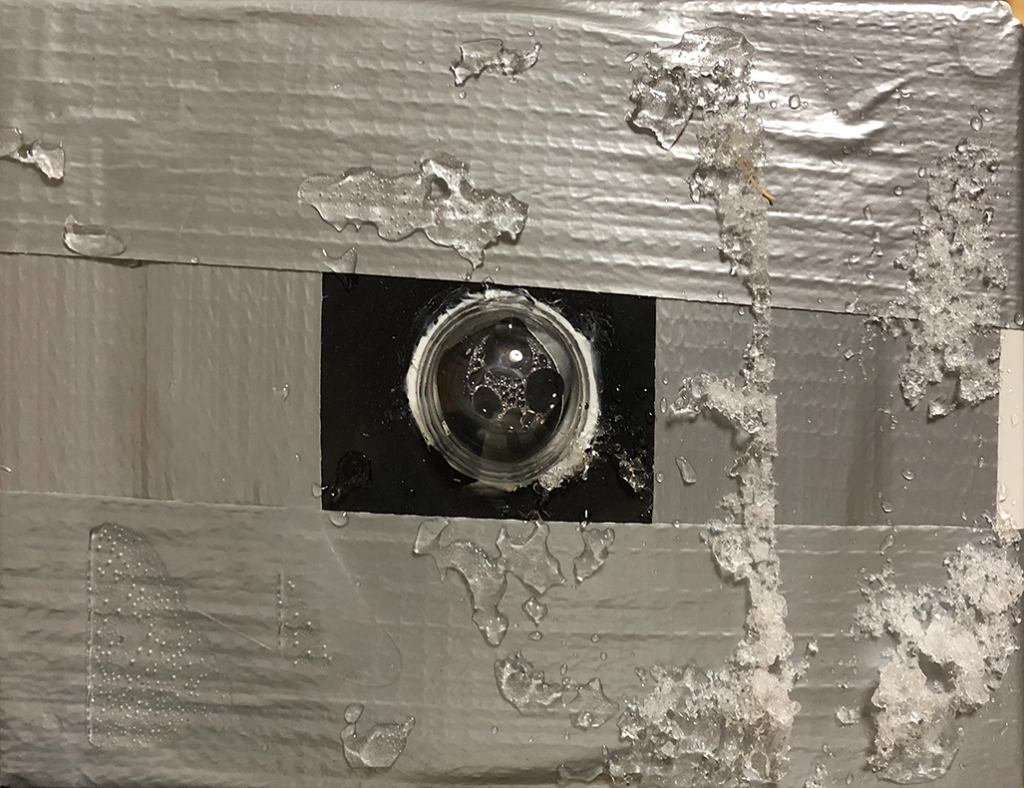
A small dome leaves little room for a heater and would need temperature and humidity sensing for control. Instead I shimmed the camera mount so there is a 1 mm gap between lid and camera plate to allow air to circulate between the dome and the box with help from the fan. We’ll see if that suffices. I also added desiccant beads in a ventilated pill bottle.
Focusing the Raspberry Pi Wide‑Angle Lens
The lens focuses by rotation; the “barrel” uses a very fine thread. Perhaps due to the very wide field, the critical focus zone is extremely narrow. The software reports a focus metric that peaks a little above 200.
The metric depends on illumination, so tracking relative values is key. Below is the focus metric as I turned the lens one full turn at a time.

Field of View
I was initially sceptical about the visible sky from our neighbourhood. Using the constellation overlay I sketched altitude rings for our camera.
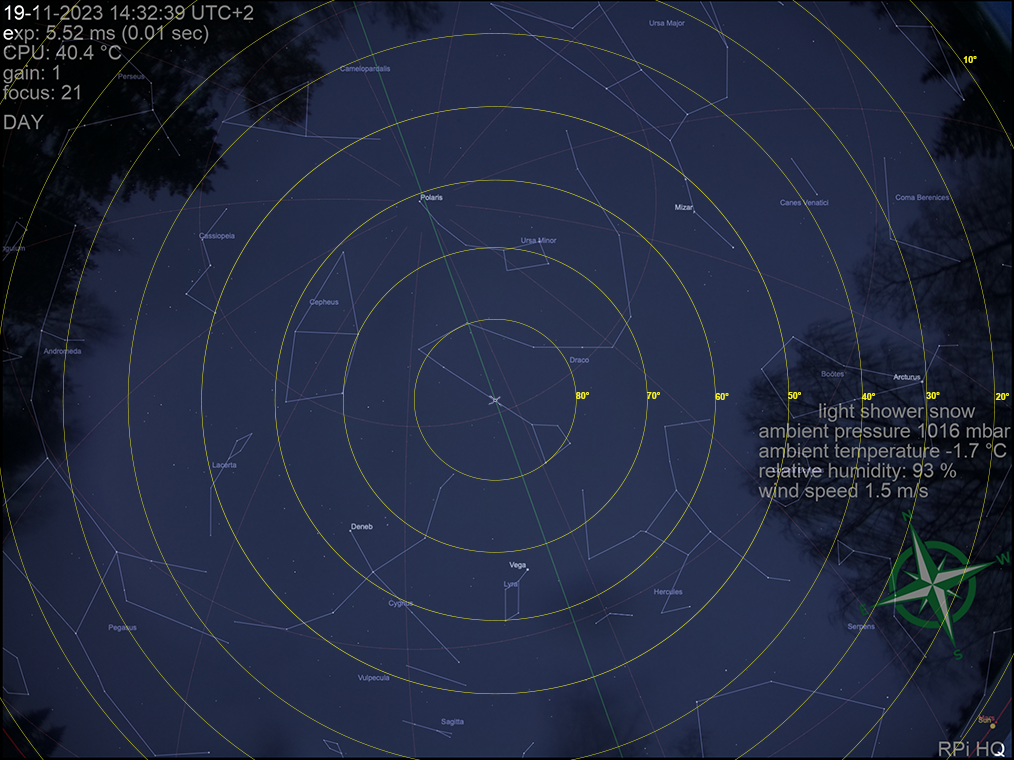
In the southwest a big birch limits the lowest visible sky to about 55° altitude; in the northeast the forest reaches 40°. In contrast, the northwest and southeast open down to ~15°. Overall the trees cover roughly one quarter of the field.
Using the Camera
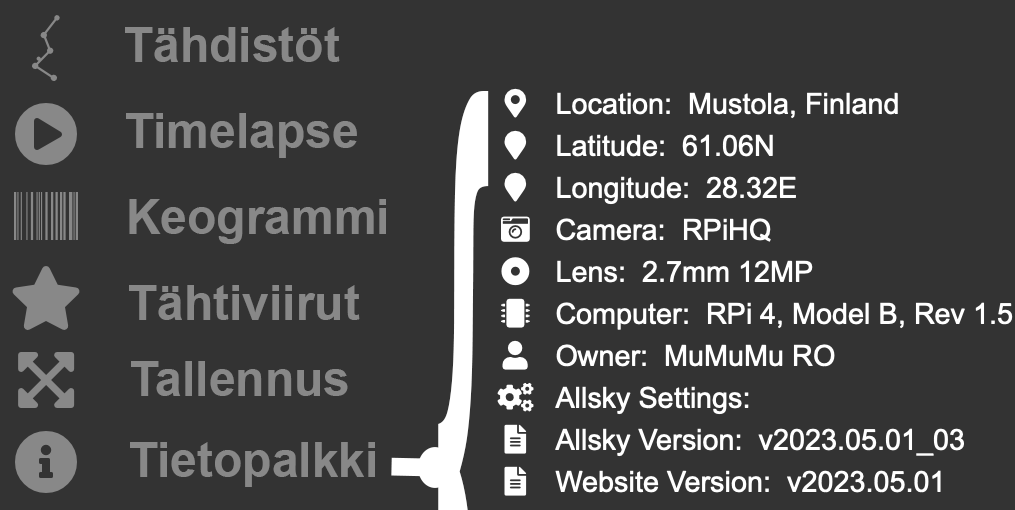
The camera updates every two minutes at night and every four minutes in daytime. The menu on the left lets you toggle the constellation overlay, view a timelapse of the night, make a star‑trail image (requires a truly clear night), generate a keogram, download the current frame and show the info panel.
The camera is also listed on Thomas’s world map of AllSky cameras, a great way to see stars at almost any time of day.
Pros, Cons and Costs
I could have planned longer and asked for advice from other observers. YouTube helped a lot and getting started with the Pi was mostly smooth, but the standard Pi documentation gave only a narrow view of using the OS, so at first I could only control the camera via the AllSky interface. When experimenting with focus, the 15‑second update cycle felt slow and forced me to write everything down — which also kept good notes.
I did figure out how to stream video control, but bandwidth made the quality much worse, so I dropped it. With winter coming I briefly regretted not building a tube‑style camera: a box collects more snow. On the other hand, the chosen antenna‑mast mount works well: cleaning snow or taking the box down for service is easy.
After the first real snowstorm most snow either blew off or melted on the warm lid. Time will tell how much maintenance is needed. Riku reportedly built his camera for ~€200. Mine ended up about twice that: the Raspberry, camera and lens alone were almost €250; the acrylic dome, cooling fan and mounting parts added roughly the same again.
I presented the project at Nova’s November meeting; it sparked lively discussion, and I published the first part of this article right away. I’m very happy I took on the project.